Embarking on a journey to expand your business through an online platform is an exciting prospect. SHOPWebo offers a seamless solution for vendors, providing a user-friendly app that connects you with potential customers. In this step-by-step guide, we’ll walk you through the simple process of downloading the app, registering your store, and navigating the approval process.
Step 1: Download and Install SHOPWebo Store App
The first step is to download the SHOPWebo Store App from the Google Play Store. Click on the following link to access the app: SHOPWebo Store App. Once the download is complete, install the app on your device.
Step 2: Join as a Store
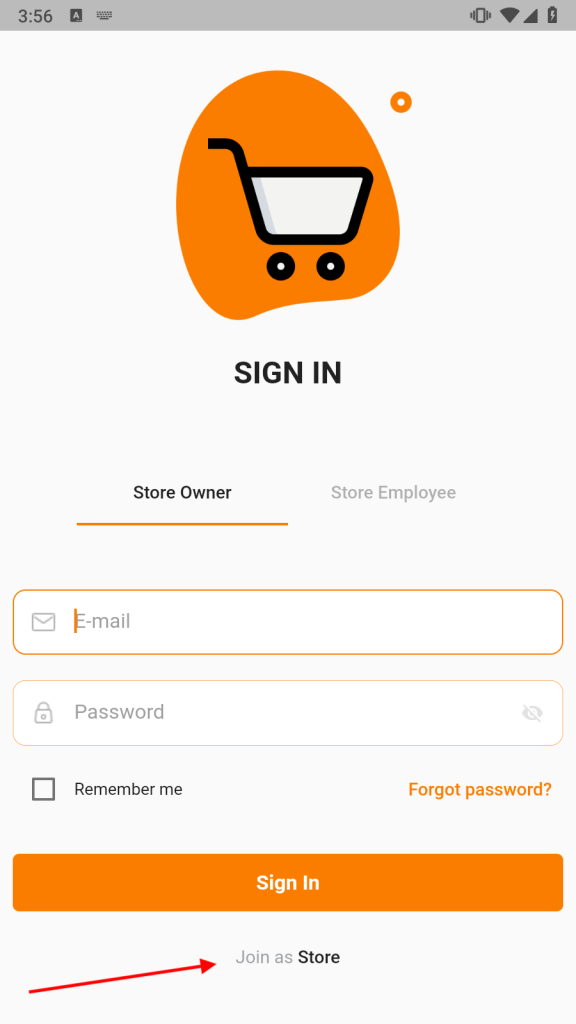
Upon launching the app, you’ll be greeted with an intuitive interface. Locate and click on the “Join as Store” option, clearly indicated on the screen. This will initiate the registration process and set the stage for your store’s online presence.

Step 3: Select Your Store Zone and Module Type
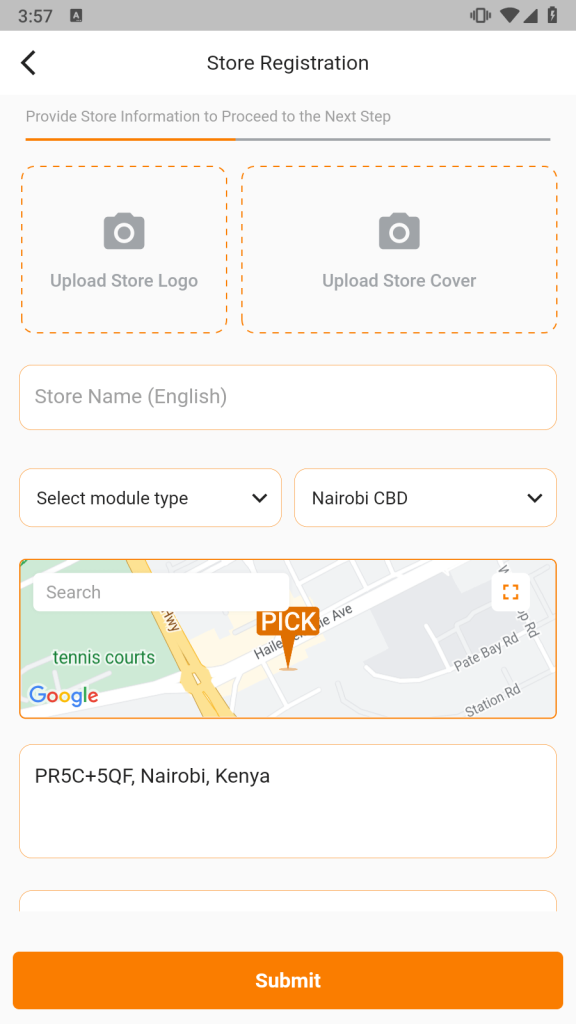
Fill in the required store details.
Under “Select module type,” choose the module that corresponds to your store type:
- For grocery stores (normal duka, mini-supermarket, supermarket, butchery, liquor store, or vegetable store): Select “Grocery.”
- For restaurants, food joints, or hotels: Select “Food.”
- For chemists/pharmacies or hospitals: Select “Pharmacy.”
- For fashion, electronics, or any other item stores: Select “Shop.”
Choose your store’s zone based on its physical location. This ensures that your products reach the right customers. Submit and proceed to the next step.

Step 4: Store Owner Details
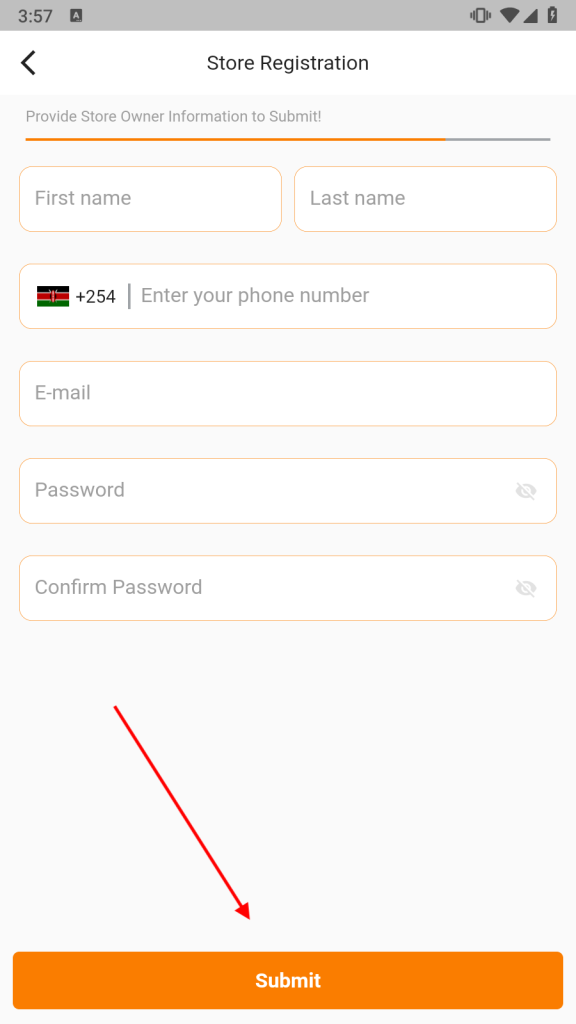
On the following page, enter the necessary details about the store owner. This information is crucial for verification purposes and ensures a smooth registration process. Once completed, submit the details to finalize your registration.

Step 5: Approval Process
After submitting your registration, SHOPWebo’s admin team will review your information. Approval is necessary to maintain the quality and credibility of the platform. Rest assured, this step is a quick process, and you’ll receive notification via email once your account is approved.
Step 6: Account Approval and Login
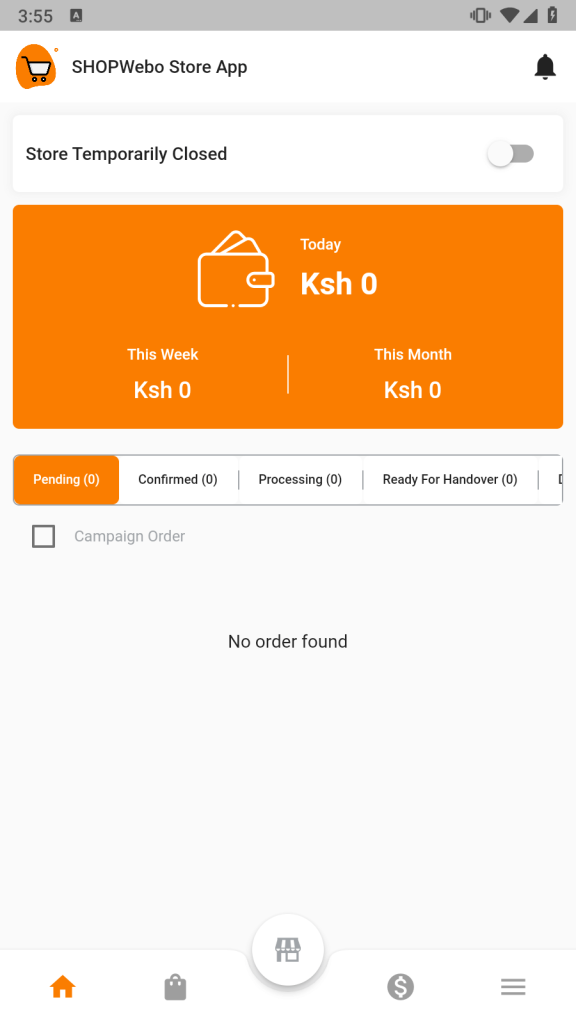
Upon approval, log in to your SHOPWebo account. You’ll be greeted with a user-friendly interface tailored for vendors. Familiarize yourself with the features and tools available to optimize your online store.

Conclusion:
Congratulations! You’ve successfully joined SHOPWebo as a vendor. The platform opens up new avenues for your business, connecting you with a wider audience. Embrace the convenience of managing your store online and explore the potential for growth in the digital marketplace. Welcome to SHOPWebo – where your business meets the future.


